A Practical Guide to Pipe Plug Sizing Based on Actual Pipe ID, Pressure Rating, and Plug Type
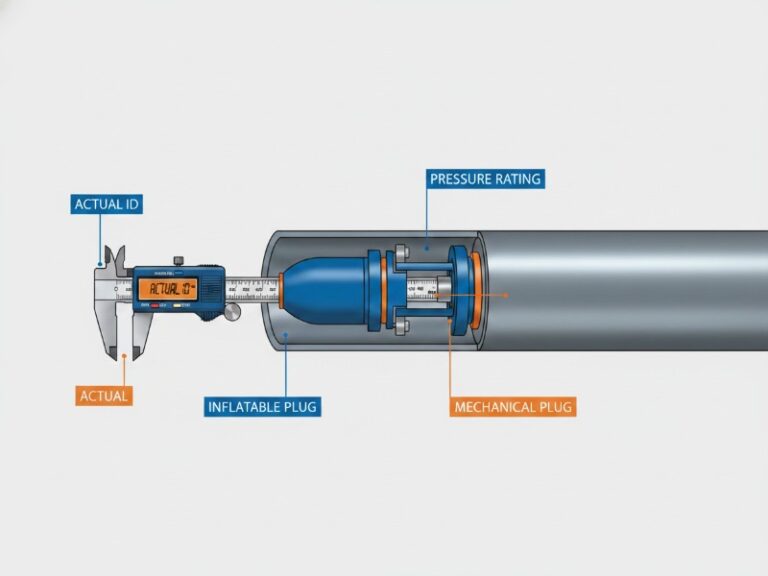
Selecting the right pipe plug starts with one rule: use the actual internal diameter of the pipe, not the nominal pipe size alone. From there, match the measured ID to the manufacturer’s size range, then confirm pressure rating, media compatibility, and installation conditions. This guide walks you through each step with clear rules, practical examples, and field verification methods.
How to Measure Pipe ID for Plug Sizing
Core conclusion: Always measure actual internal diameter at the insertion point. Nominal pipe size is only a starting reference.
Step-by-Step Measurement Process
- Clean the pipe interior at the insertion point. Remove rust, debris, welding slag, and deposits.
- Insert your measurement tool to a depth of at least 2x the pipe diameter.
- Take three measurements at 120-degree intervals around the circumference.
- Record the smallest measurement as your working ID. Use the smallest measured ID for plug selection.
- Check for ovality. If measurements vary significantly, note this for plug selection.
Tools by pipe size:
| Pipe Size | Recommended Tool |
|---|---|
| Under 6″ | Digital caliper |
| 6″ to 12″ | Internal diameter tape |
| Over 12″ | Telescoping bore gauge |
Why measurement matters: Two pipes with the same NPS but different schedules have different IDs. A 4-inch Schedule 40 pipe has 4.026″ ID. A 4-inch Schedule 80 pipe has 3.826″ ID. The same plug cannot seal both.
Pipe Plug Sizing by Pressure Rating
Core conclusion: Pressure requirement is usually the primary factor determining plug type selection.
Pressure-Based Selection Guidelines
| Рабочее давление | Рекомендуемый тип штекера | Typical Applications |
|---|---|---|
| 0-15 PSI | Standard inflatable | Gravity sewer, storm drain, low-pressure gas |
| 15-50 PSI | Reinforced inflatable | Water lines, irrigation, pneumatic tests |
| 50-150 PSI | Heavy-duty inflatable or mechanical | Municipal water mains, chemical transfer |
| Above 150 PSI | Mechanical compression recommended | Natural gas, crude oil, steam lines |
Safety margin rule: Select a plug rated for at least 25% higher pressure than your maximum operating pressure. A line operating at 80 PSI requires a plug rated for minimum 100 PSI.
When inflatable plugs are not recommended:
- Operating pressure above 150 PSI (though some heavy-duty models reach higher)
- Pipe temperature above 180°F for standard rubber
- Permanent installation longer than 30 days
When mechanical plugs are typically required:
- Natural gas transmission lines (many codes specify mechanical)
- Pressures above 150 PSI
- Hydrocarbon service with long-term isolation needs
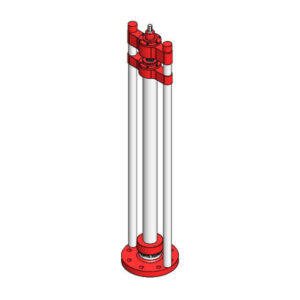
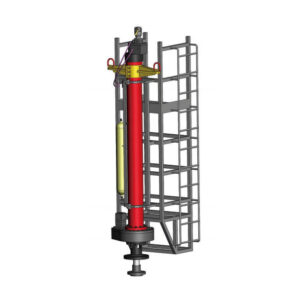
Inflatable vs Mechanical Pipe Plug
Core conclusion: Choose inflatable for temporary, variable-size jobs under 150 PSI. Choose mechanical for high pressure, permanent installation, or repeated use.
| Коэффициент сравнения | Надувная заглушка | Механический штекер |
|---|---|---|
| Sizing method | Diameter range (e.g., 6″ to 10″) | Specific ID ±0.125″ |
| Ovality tolerance | Up to 5% typical | Up to 2% typical |
| Max pressure | Depends on model and manufacturer | Depends on model and manufacturer |
| Installation time | 2-5 minutes | 5-15 minutes |
| Retrieval under pressure | Usually no | Some models yes |
| Cost per size range | Lower (one plug fits multiple sizes) | Higher (one plug per size) |
| Лучшее применение | Temporary, variable pipe conditions | Permanent, high-pressure, repeated use |
Selection shortcut:
- Temporary water/sewer isolation under 50 PSI → Inflatable
- Natural gas above 100 PSI → Mechanical (check local codes)
- Multiple pipe sizes on one job → Inflatable
- Long-term permanent plug → Mechanical
Pipe Plug Size Chart by NPS and ID
Core conclusion: Match your measured ID to the plug range column. Always verify pressure rating with the product datasheet.
| Pipe NPS | Typical ID Range (inches) | Inflatable Plug Range | Mechanical Plug Size |
|---|---|---|---|
| 2″ | 1.94 – 2.07 | 1.75″ – 2.25″ | 2″ |
| 3″ | 2.90 – 3.07 | 2.75″ – 3.25″ | 3″ |
| 4″ | 3.83 – 4.03 | 3.75″ – 4.50″ | 4″ |
| 6″ | 5.76 – 6.36 | 5.50″ – 6.50″ | 6″ |
| 8″ | 7.63 – 8.39 | 7.50″ – 8.50″ | 8″ |
| 10″ | 9.56 – 10.52 | 9.50″ – 11.00″ | 10″ |
| 12″ | 11.50 – 12.54 | 11.50″ – 13.00″ | 12″ |
Can One Pipe Plug Size Cover Multiple Pipe Schedules?
Core conclusion: Not necessarily. Different schedules change internal diameter significantly.
ID variation by schedule for 6-inch pipe:
| Schedule | Internal Diameter | Same Plug Works? |
|---|---|---|
| Schedule 10 | 6.357″ | Usually no (too loose) |
| Расписание 40 | 6.065″ | Reference size |
| Расписание 80 | 5.761″ | Usually no (too tight) |
Exception: Some mechanical plugs offer interchangeable rubber disc sets. A single metal body with different disc thicknesses can cover multiple schedules. Check manufacturer specifications.
Field advice: Pipe schedule is often unknown on older lines. Always measure ID directly rather than trusting schedule markings.
How to Size Pipe Plugs for Oval or Deformed Pipe
Core conclusion: Oval pipes require inflatable plugs with wider tolerance. Severely deformed pipes may need foam-filled plugs.
Identifying oval pipe: When your three ID measurements vary by more than 3% for steel pipe or 5% for plastic pipe, the pipe is out-of-round.
Solution by ovality percentage:
| Ovality | Recommended Solution |
|---|---|
| Under 3% | Standard inflatable plug works |
| 3% to 5% | Inflatable plug with wider range; consider one size smaller |
| 5% to 8% | Foam-filled inflatable plug recommended (lower pressure rating) |
| Above 8% | Alternative isolation method advised |
Note on foam-filled plugs: These compress to 50-60% of pipe ID and expand to fill irregular shapes. Limitation: Maximum pressure rating is typically lower than standard plugs. Check manufacturer datasheet for specific ratings.
How to Verify Correct Plug Fit Before Full Pressure Application
Core conclusion: Always perform a low-pressure verification test before applying full operating pressure.
Three Field-Verified Test Methods
Method 1: Bubble Test (low pressure applications)
- Insert and inflate plug to manufacturer spec
- Pressurize upstream side to 5 PSI
- Apply soap solution around plug perimeter
- Bubbles indicate bypass—remove and size up
Method 2: Pressure Hold Test (all pressures)
- Isolate a test section between plug and a closed valve
- Pressurize to 50% of operating pressure
- Monitor gauge for 10 minutes
- Pressure drop exceeding 5% indicates seal issue
Method 3: Mechanical Pull Test (mechanical plugs only)
- Set plug according to manufacturer torque specification
- Attach pull cable to retrieval eye
- Apply moderate axial force
- Movement indicates insufficient compression
When to re-test: After any pressure spike, temperature change exceeding 30°F, or significant line vibration.
Common Pipe Plug Sizing Mistakes
| Mistake | Consequence | Prevention |
|---|---|---|
| Using NPS instead of measured ID | Bypass leakage or plug ejection | Always measure ID in the field |
| Ignoring pressure rating safety margin | Potential plug blowout | Add 25% safety margin |
| Assuming one plug fits all schedules | No seal or won’t insert | Check ID against plug range |
| Installing without verification test | Unknown leak path | Test at low pressure before use |
| Using wrong rubber for medium | Swelling or degradation | Request compatibility data |
Quick Decision Guide for Pipe Plug Selection
- Measure actual ID at the insertion point
- Check operating pressure and add 25% safety margin
- Confirm medium compatibility with elastomer options
- Choose inflatable or mechanical based on pressure and job duration
- Select plug size matching your measured ID to manufacturer range
- Verify fit with low-pressure test before full operation
This six-step sequence applies to most pipeline isolation jobs. Download or save this guide for field reference.
Frequently Asked Questions About Pipe Plug Sizing
Q1: Is pipe plug size based on NPS or actual ID?
A: Actual ID. NPS is only a starting reference. Always measure ID at the insertion point.
Q2: How do I measure pipe ID without cutting the pipe?
A: Use an internal diameter tape or telescoping bore gauge inserted through an existing opening, flange, or tapped fitting. For pipes under 6 inches, a digital caliper works.
Q3: What happens if I use the wrong size pipe plug?
A: An undersized plug leaks or blows out. An oversized plug won’t insert properly. Both create safety hazards.
Q4: Can one plug fit multiple schedules?
A: Not necessarily. Different schedules have different IDs. Check your actual measurement against the plug’s specified range.
Q5: Inflatable vs mechanical: which should I choose?
A: Inflatable for temporary jobs under 150 PSI. Mechanical for high pressure or permanent installation.
Q6: How do I know if my pipe is too oval for a standard plug?
A: Measure ID at three angles. If variation exceeds 3% for steel or 5% for plastic, consult the manufacturer.
Q7: Can I reuse a pipe plug on a different pipe size?
A: Inflatable plugs with a wide range can be reused within that range. Mechanical plugs are size-specific.
Q8: How do I verify a pipe plug is sealed before full pressure?
A: Run a pressure hold test at 50% of operating pressure for 10 minutes. Drop under 5% confirms good seal.