
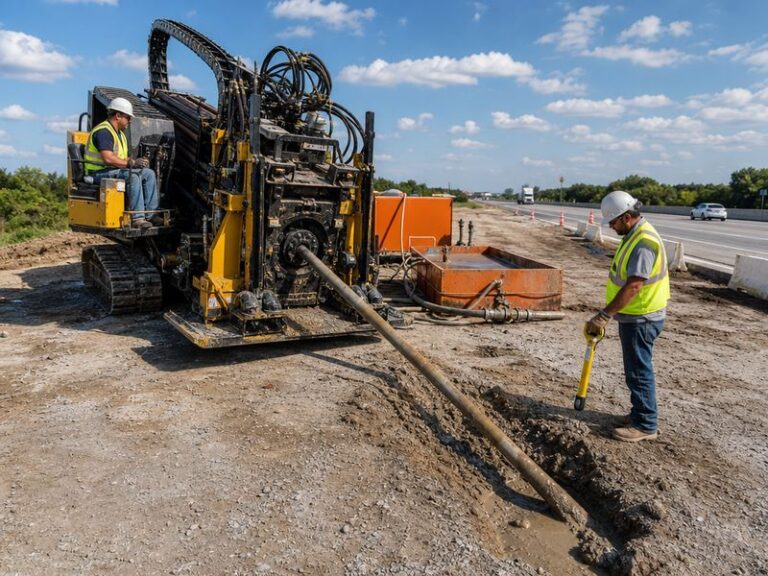
The horizontal directional drilling process consists of five main stages: site preparation and bore planning, pilot hole drilling, prereaming, pipe pullback, and site restoration and commissioning.
This guide explains what happens in every stage, how steering and drilling fluids work, how long the HDD process typically takes, and when horizontal directional drilling is a better choice than open trenching. It is based on our field experience supporting pipeline construction, trenchless repair and utility crossings across multiple continents.
What Is the Horizontal Directional Drilling Process?
Horizontal directional drilling (HDD) is a steerable, trenchless drilling method for installing pipelines, conduits and cables underground along a controlled arc without open-cut excavation. The drilling process starts with a small-diameter pilot bit that is steered along a designed path, continues with enlarging passes that widen the bore, and ends with a pullback pass that installs the product pipe. Because only the entry and exit points are open to the surface, HDD is widely used beneath roads, railways, rivers, runways and environmentally sensitive areas.
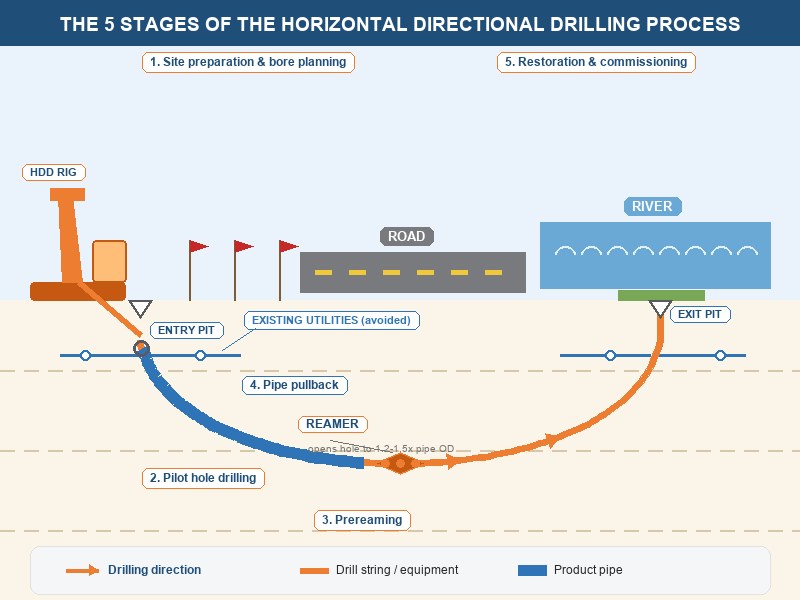
Figure 1. The five stages of the horizontal directional drilling process, from entry pit to exit pit.
The scale of the industry explains why the process matters. The global horizontal directional drilling market was valued at roughly USD 9.2 billion in 2025 and is projected to approach USD 25 billion by 2034, a compound annual growth rate of about 11.7 percent, according to industry market research published in 2025–2026. More crossings are being drilled under busier, more congested corridors, which places higher demands on bore planning, drilling fluids management and installation quality in every stage of the process.
The 5 Main Stages of the Horizontal Directional Drilling Process
The stages of horizontal directional drilling follow the same five-stage sequence, although bore length, pipe diameter and ground conditions change how each stage is executed. The three underground stages, pilot hole drilling, prereaming and pipe pullback, are sometimes described as the process on their own, but a reliable installation always starts and ends on the surface. The table below summarizes what happens in each stage of the horizontal directional drilling process.
| Stage | What Happens | What Controls Success |
|---|---|---|
| 1. Site preparation and bore planning | Permits, utility locates, geotechnical review, entry and exit angle design, drilling fluid plan | Design accuracy and risk identification |
| 2. Pilot hole drilling | A steerable bit drills a small-diameter hole along the designed path | Steering accuracy and guidance system |
| 3. Prereaming | Enlarging tools open the pilot hole to 1.2 to 1.5 times the product pipe diameter | Enlargement schedule and fluid circulation |
| 4. Pipe pullback | The pre-assembled pipe string is pulled through the open bore | Pull load control and string integrity |
| 5. Restoration and commissioning | Fluids are recovered, the site is restored, and the line is tested | Waste handling and quality verification |
Stage 1. Site Preparation and Bore Planning
Preparation decides whether the drilling process will be smooth or costly. The work starts on the surface: the entry and exit points are staked, existing utilities are located and potholed, and a geotechnical review is completed before the directional drilling rig arrives on site.
- Secure permits and crossing agreements for roads, waterways, railways and utility corridors.
- Verify existing utility locations with one-call locates and vacuum excavation; never rely on records alone.
- Complete geotechnical investigation along the bore path; soil and rock conditions set the enlargement schedule and the fluid program.
- Design entry and exit angles, bore depth and curvature limits for the product pipe and the guidance system.
- Plan drilling fluid mixing, recycling and disposal, including frac-out and waterway protection measures.
In our projects, crossings that skip potholing or geotechnical review rarely fail during the pilot hole; they fail later, during hole enlargement or the pulling phase, when recovery is most expensive. Bore planning is the cheapest stage of the process and the one with the greatest leverage over total cost.
Stage 2. Pilot Hole Drilling
The pilot bore is the first underground stage of the drilling process. A drill string with a steerable downhole assembly advances a small-diameter bit, typically 3 to 5 inches, from the entry pit to the exit pit along the designed arc. The operator steers by rotating the string for straight drilling and holding the bent housing at a fixed orientation to change direction.

Figure 2. A walkover locator tracks the pilot bit and beacon during pilot-hole drilling.
Guidance accuracy depends on the system and the depth. Walkover locators read a beacon behind the bit and are practical to depths of about 30 to 40 feet (9 to 12 meters), with typical location accuracy of roughly 1 to 2 percent of depth. Wireline and gyro steering systems are used for deeper bores, longer crossings and congested corridors where a surface signal cannot be received. In our experience, the guidance system choice should be fixed in the bore plan, not improvised in the field.
Stage 3. Prereaming (Hole Enlargement)
Once the pilot bore reaches the exit pit, the drill string is fitted with a reamer and pulled back through the hole to enlarge it to the final diameter. The industry rule of thumb, reflected in good practice guidance, is a reamed hole of 1.2 to 1.5 times the product pipe outside diameter. For large-diameter steel pipelines, several prereaming passes open the hole progressively wider, and each pass circulates drilling fluid to stabilize the hole and carry cuttings to the surface.
This hole-enlargement stage consumes most of the underground time on large-diameter projects. Rock bores add wear and schedule: hard rock multiplies bit consumption, fluid demand and rig hours. The number of passes, tooling choice and fluid flow rate are the main levers that keep the hole open and stable until the product pipe is installed.
Stage 4. Pipe Pullback
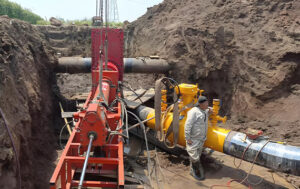
The pulling phase is where the installed product pipe is placed, and it is the point of no return in the HDD process. The product pipe string, assembled at the entry side with welding, fusion or mechanical joints, is connected to the drill string through a swivel and pulled into the enlarged hole in one continuous operation. The swivel prevents the pipe string from rotating while the drill string rotates.
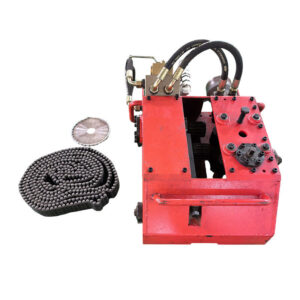
- Prepare the pipe string before the pull begins; fabrication with pipeline cutting machines, welding and cold bending must be complete, since stopping mid-pull is difficult and risky.
- Monitor pull loads continuously and compare them with the pipe’s allowable installation load; sudden spikes usually indicate a hole stability problem.
- Control pull speed and keep drilling fluid circulating; low drag and adequate lubrication separate a clean pull from a stuck string.
- Match the product pipe material to the design; steel, HDPE and ductile iron each impose different pullback loads and bending limits.
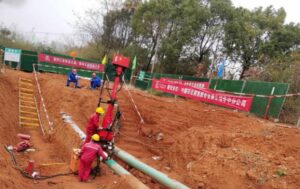
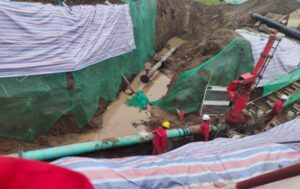
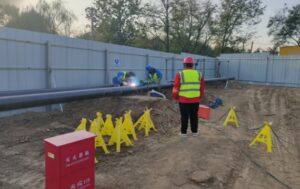
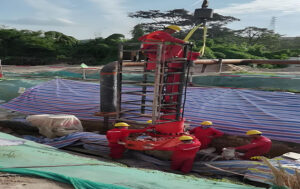
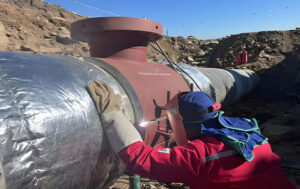
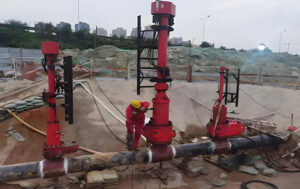
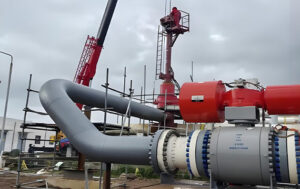
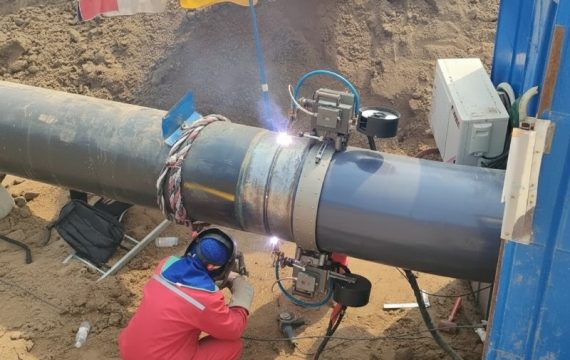
On the large-diameter steel crossings we support, the pipe string is fabricated on the entry spread with pipeline automatic welding technology and pipeline cold bending before the pull pass begins. Where the new line must connect into live systems, pipeline hot tapping equipment and pipeline plugging pigs are included in the same work package so the tie-in proceeds safely after the pull. A well-prepared string is the single largest factor in a successful pull.
Stage 5. Site Restoration and Commissioning
The process ends where it began, on the surface. Drilling fluids are recovered or treated, excess cuttings are disposed of, and the entry and exit pits are backfilled and restored to pre-construction condition. The installed line is then cleaned, gauged and pressure-tested before handover.
Restoration is often the most visible part of the horizontal directional drilling process to the public and the easiest to under-budget. In our bid reviews, site preparation, drilling fluids and restoration together commonly account for 30 to 45 percent of total project price on mid-size crossings.
How Long Does the HDD Process Take?
A typical mid-size crossing takes from several days to a few weeks of site time, depending on length, diameter, geology and weather. The table below shows the usual time profile of the drilling process.
| Work Group | Typical Time Share | Main Driver |
|---|---|---|
| Preparation and restoration | 20 to 40 percent | Permits, restoration scope, fluid handling |
| Pilot hole | 10 to 20 percent | Bore length and steering difficulty |
| Prereaming | 30 to 50 percent | Pipe diameter, rock, number of passes |
| Pullback | 10 to 20 percent | String length, drag, weather windows |
The pilot hole is usually the fastest underground stage; hole enlargement dominates the schedule on large diameters and in rock. On projects we have tracked, preparation and restoration together commonly account for 20 to 40 percent of total site time, and on smaller crossings they can rival the underground stages.
HDD Process vs. Open Trenching: Which One Fits Your Project?
The choice between HDD and open trenching is a trade-off between surface disruption and cost: directional drilling wins when restoration, traffic, waterways or environmental constraints make open cut expensive, while open trenching wins on short, shallow, straight runs where mobilization costs dominate.
| Factor | HDD Process | Open Trenching |
|---|---|---|
| Surface disruption | Minimal; only entry and exit pits | Full-length excavation |
| Crossing obstacles | Roads, rivers, railways and runways without disruption | Requires bypass, temporary works or shutdowns |
| Installation depth | Controlled depth down to tens of meters | Typically shallow |
| Cost profile | Higher setup and unit cost on short runs | Lower unit cost on simple runs |
| Schedule risk | Driven by geology and fluid management | Driven by restoration and traffic control |
| Environmental impact | Small footprint, lower habitat disturbance | Larger footprint, erosion and dust controls needed |
For very large diameters and short distances, microtunneling is a related trenchless alternative, while HDD remains the standard for long, curved, steerable crossings. Utility owners we work with typically use directional drilling wherever the surface value, restoration cost or crossing obstacle makes open cut the more expensive option.
What Can Go Wrong During the Horizontal Directional Drilling Process?
Every failure mode traces back to one of the five stages, which is why stage discipline matters. The most common problems we see on crossings are:
- Frac-out: drilling fluid escapes to the surface or into a waterway, usually because of shallow cover, high fluid pressure or a weak soil layer. Prevention starts in the planning stage and continues with pressure monitoring.
- Stuck pipe: the string or downhole tool becomes trapped by a collapsed hole, cuttings buildup or excessive drag; recovery is expensive and sometimes impossible.
- Collapsed or unstable hole: the hole closes before the pull, often from insufficient fluid circulation or an undersized hole.
- Utility strikes: contact with an unlocated or mislocated existing utility during pilot-hole drilling; potholing and positive clearance prevent most of these.
- Lost circulation: fluid escapes into voids or highly permeable ground, starving the hole of the lubrication and cuttings transport it needs.
Planning a crossing? Most of the failure modes above are preventable in the planning stage — our engineering team reviews your bore plan before you commit. Contact our engineers.
Key Takeaways
- Every crossing moves through five stages: planning, the pilot bore, hole enlargement, pipe installation and restoration.
- The hole is opened to 1.2 to 1.5 times the product pipe outside diameter.
- Hole enlargement consumes the largest share of underground time on big diameters and in rock.
- Directional drilling earns its cost where restoration, traffic or obstacle-crossing costs make open cut expensive.
Horizontal Directional Drilling Process FAQ
How deep can horizontal directional drilling go?
HDD depth is limited by the guidance system and the rig, not by the method itself. Walkover locators are practical to about 30 to 40 feet; deeper crossings use wireline or gyro steering, and river crossings are routinely drilled at depths of 50 to 100 feet or more.
How long can an HDD bore be?
Small rigs typically install 300 to 600 feet, mid-size rigs 1,000 to 2,000 feet, and large rigs 4,000 to 6,000 feet or more. The practical limit is set by pullback force, steering accuracy and fluid circulation, not by the pipe itself.
What pipe materials can be installed with HDD?
Steel, HDPE and ductile iron are the common choices. HDPE is light and flexible, steel handles high pressure and large diameters, and ductile iron suits water mains; each material changes the allowable pull loads and bending limits in the drilling process.
Is drilling mud required in every HDD process?
Yes. Drilling fluid, typically a bentonite-based mix of water, clay and additives, stabilizes the hole, cools the tools, carries cuttings and reduces friction during pullback. Fluid management is a core activity in every stage of the drilling process.
Can the HDD process be used in rock?
Yes, with the right rig and reamers. Rock bores are slower and more expensive because bit wear and fluid demand increase, but hard rock crossings are routine for large rigs with mud motors and rock tooling.
How much does HDD cost compared to open trenching?
The method carries higher mobilization and unit costs on short, shallow runs, while open trenching is cheaper on simple, straight crossings. Where site preparation, drilling fluids and restoration are extensive, they can reach 30 to 45 percent of total project price — which is why the method becomes competitive wherever restoration, traffic or obstacle-crossing costs make open cut expensive.
How JSW Supports Horizontal Directional Drilling Projects
JSW is a pipeline engineering and construction partner supporting owners, EPC firms and contractors across the full lifecycle of HDD and trenchless work. We provide pipeline construction services and pipeline maintenance services, together with our trenchless repair technology and the specialized capabilities the horizontal directional drilling process depends on: pipeline automatic welding technology for pipe string fabrication, pipeline cold bending for entry-spread geometry, and pipeline hot tapping and plugging services for live-line tie-ins after the bore is complete.
What distinguishes our support is integrated execution: planning that accounts for string fabrication and welding, fluid management that respects environmental limits, and restoration work that returns the site to a defensible condition.
- Integrated delivery: one accountable team from planning and string fabrication through pipe installation and restoration, reducing interface risk and schedule loss.
- Auditable process data: daily drilling records, drilling fluid management logs and as-built drawings delivered with every crossing.
- Transparent, risk-explicit pricing: itemized drilling fluid, restoration and contingency costs, with no hidden changes after award.
- Safety and compliance: utility locating, potholing and environmental protection executed to industry damage-prevention practice.
If you are planning a trenchless crossing, contact our engineering team via the contact page or sales hotline with your bore plan and site data, and we will provide a technical review and a scoped proposal within five working days.










 English
  Arabic
  Russian
  Spanish
  French
  Vietnamese
  Polish
  Thai
Thai  Indonesian
  Turkish
  Portuguese