
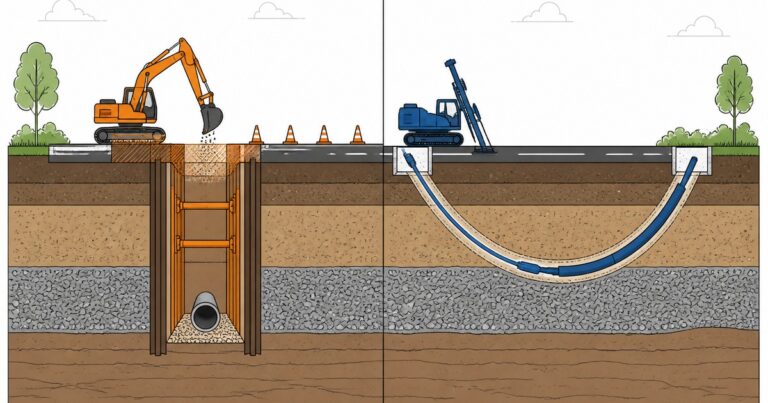
Elige la excavación abierta cuando la tubería sea de poca profundidad, corta, alimentada por gravedad o de gran diámetro y se pueda abrir la superficie; elige la perforación horizontal dirigida (HDD) cuando la tubería sea una conducción a presión que deba pasar por debajo del pavimento, del agua, de las vías férreas o de una red densa de servicios públicos sin necesidad de excavar la superficie; y, a continuación, decide en función del coste total de instalación, no del precio de la oferta.
Esta guía compara el soterramiento con el tendido a cielo abierto en función de los siete factores que realmente determinan los proyectos de tuberías: servicio y clase, condiciones del terreno, profundidad, diámetro y longitud del tramo, valor de la superficie, calendario y riesgo. Concluye con un marco de selección de siete pasos, los datos de costes en los que se basa y los casos en los que ninguno de los dos métodos por sí solo es la respuesta adecuada; está dirigida a propietarios de tuberías, ingenieros municipales y contratistas EPC que tengan que justificar su elección por escrito.
Puntos clave
- El grado de pendiente es el factor determinante. Las tramas de gravedad con requisitos estrictos de pendiente corresponden a la excavación a cielo abierto o al microtunelado; la perforación horizontal dirigida (HDD) es adecuada para tuberías a presión a lo largo de un arco curvo.
- La excavación a cielo abierto resulta más económica en cuanto al precio de la oferta en terrenos sin construcciones. La perforación horizontal dirigida (HDD) suele resultar más económica en cuanto al coste total de instalación una vez que se han presupuestado la restauración del pavimento, el control del tráfico y el riesgo de daños.
- El estudio del terreno no es opcional en ninguno de los dos métodos. Las directrices de diseño de la norma ASTM F1962 dan por hecho que se dispone de datos sobre el suelo antes de diseñar una perforación mediante HDD; las normas de seguridad en excavaciones lo dan por hecho antes de abrir una zanja.
- Realiza una comparación estructurada en un único ámbito: cinco datos de entrada, con el precio de ambos métodos desglosado línea por línea y una decisión documentada.
¿En qué consiste la instalación de tuberías a cielo abierto?
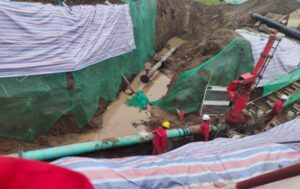
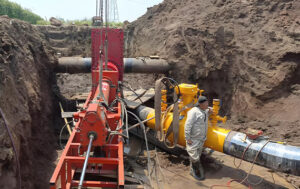
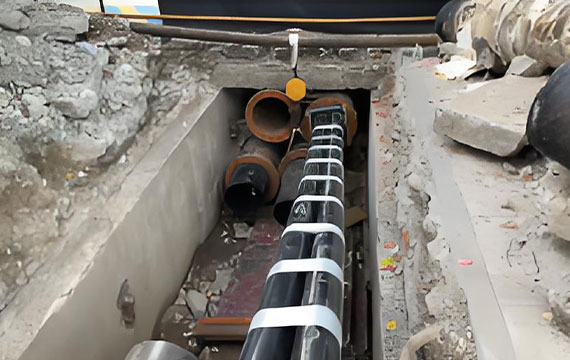
La instalación a cielo abierto —también denominada construcción en zanja abierta o excavación de zanjas— consiste en excavar una zanja continua a lo largo del trazado, colocar la tubería sobre un lecho preparado, rellenar en capas compactadas y reconstruir la carretera, el arcén o el paisaje situado sobre ella. Dado que la tubería se introduce desde la superficie, es posible fijar con precisión el trazado y la nivelación, y se puede instalar prácticamente cualquier diámetro o profundidad, siempre que no se superen los límites de apuntalamiento y desagüe.
La excavación a cielo abierto sigue siendo el método habitual en la mayoría de las obras de construcción de tuberías por tres razones prácticas: el equipo está disponible en todas partes, el coste unitario en terreno abierto es el más bajo de todos los métodos y todos los detalles de las uniones, soldaduras y lechos quedan a la vista para su inspección antes del relleno. Estas ventajas son reales y, a menudo, decisivas: la construcción de una tubería principal de agua en terreno virgen que atraviese tierras de cultivo rara vez resulta rentable mediante perforación.
La excavación a cielo abierto no tiene preferencias en cuanto al tipo de suelo ni un límite máximo de diámetro, pero todas sus limitaciones están relacionadas con la superficie y varían en función del valor de esta:
- Seguridad en las excavaciones. Es obligatorio utilizar un sistema de protección —taludes, escalones, apuntalamiento o una caja de zanja— para zanjas de cinco pies (aproximadamente 1,5 m) o más de profundidad, salvo que la excavación se realice íntegramente en roca estable, de conformidad con la norma 29 CFR 1926.652 de la OSHA, y un ingeniero profesional colegiado debe diseñar el sistema para zanjas de más de 20 pies (unos 6 m) de profundidad.
- Aguas subterráneas y escombros. Cuando el nivel freático se sitúe por encima de la parte inferior de la estructura, el equipo deberá achicar el agua, eliminarla conforme a lo establecido en la autorización correspondiente y supervisar el asentamiento de las estructuras adyacentes. Los suelos urbanos contaminados implican además la caracterización de los residuos y su transporte.
- Ocupación del suelo. La zanja ocupa todo el pasillo durante todo el tiempo que dura la obra, lo que impide el paso de peatones, el acceso a las entradas de vehículos, las entregas y el aparcamiento.
- Restauración. El pavimento se repone en toda su anchura sobre la zanja, y muchos ayuntamientos cobran una tasa por el permiso de corte del pavimento y exigen una fianza de restauración, con inspecciones por fases del relleno y la repavimentación.
- Riesgo de daños a las redes de servicios públicos. Cada metro de zanja abierta supone un encuentro con lo que los registros no han recogido: el mayor grado de exposición de todos los métodos de instalación.
Las estadísticas sobre impactos son el argumento más claro a favor de los métodos de pesaje, en lugar de recurrir por defecto a una zanja. La Herramienta de Notificación de Daños (Damage Information Reporting Tool) de la Common Ground Alliance registró aproximadamente 197 000 daños a redes de servicios públicos notificados en Estados Unidos en 2024, y el estudio de la Alianza de 2026 Entre líneas El estudio prevé 668 999 incidentes de daños para 2025 y calcula que el impacto económico anual total de los daños a las redes de servicios públicos subterráneas ascenderá a $83,2 mil millones, una vez contabilizadas las reparaciones, los cortes de suministro, las lesiones y las reclamaciones de terceros. Ese coste lo asumen las empresas de servicios públicos, los ayuntamientos y los usuarios, y la mayor parte de él es evitable.
¿Qué es la perforación horizontal dirigida (HDD)?
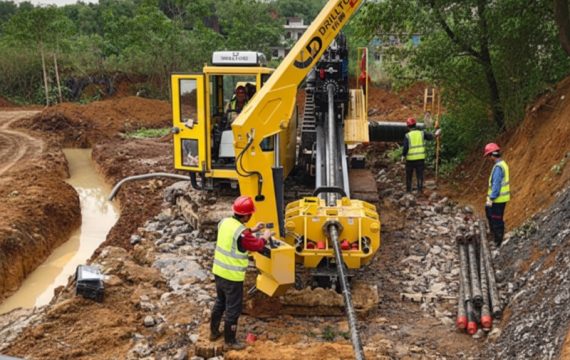
La perforación direccional horizontal es un método sin zanja y orientable que permite instalar tuberías siguiendo un arco subterráneo controlado sin necesidad de abrir la superficie. Una plataforma perfora un pozo piloto con un conjunto orientable, lo ensancha hasta alcanzar el diámetro final en una o varias pasadas y, a continuación, extrae la sarta de tuberías presoldadas a través del pozo ya terminado. Solo se excavan los pozos de entrada y salida.
El ámbito de aplicación del método es amplio. Las directrices de diseño publicadas para el maxi-HDD abarcan perforaciones de entre 50 y 1.200 mm (2 a 48 pulgadas) de diámetro aproximadamente, así como perforaciones únicas que superan los 1.800 m, con una profundidad de seguridad de unos 15 m o más por debajo del obstáculo más profundo. Las plataformas más grandes que figuran en los censos publicados de plataformas de gran tamaño están homologadas para perforaciones de más de 6.400 pies con tubos de hasta 60 pulgadas de diámetro. En el otro extremo de la escala, las plataformas mini-HDD se encargan de las conexiones de servicio y los cruces cortos, donde el límite lo marca el coste de movilización, y no la capacidad.
Lo que el HDD no puede hacer es mantener una pendiente. Una perforación direccional es una curva, lo que la hace ideal para tuberías a presión de acero o HDPE, pero poco adecuada para el flujo por gravedad, en el que debe mantenerse una caída continua de principio a fin. Además, concentra el riesgo bajo tierra: el fluido de perforación se bombea a presión para refrigerar la herramienta, transportar los residuos de perforación y estabilizar el sondeo, y cuando esa presión supera la resistencia del terreno circundante, el fluido se escapa hacia la superficie, un desagüe pluvial o un curso de agua —el retorno involuntario, o «frac-out», que ocupa un lugar destacado en los registros de riesgos de la perforación horizontal dirigida (HDD) y que, en muchas jurisdicciones, debe abordarse mediante un plan de contingencia antes de que se autorice la perforación.

HDD frente a tajo abierto: comparación lado a lado
La tabla que aparece a continuación es la comparación que la mayoría de los propietarios buscan cuando comparan el método HDD con el de corte abierto. Considérala más bien como una ayuda para tomar una decisión que como un veredicto: en una alineación concreta, dos o tres filas tendrán más peso que todas las demás.
| Criterio | A cielo abierto | HDD |
|---|---|---|
| Alineación y nivelación | Cualquier trazado y pendiente; posibilidad de flujo por gravedad | Arco curvo; caudal típico en función de la presión |
| Diámetro de la tubería | Sin límite práctico | Entre 50 y 1.200 mm (2–48 pulgadas) aproximadamente, como norma general |
| Longitud de la tirada | Sin límite, instalado por tramos | Más de 1.800 m en una sola perforación; los tramos cortos compensan los costes de movilización |
| Profundidad | Determinado por el apuntalamiento, el drenaje y el coste | Se determina en función de la geometría del taladro; la cubierta profunda es habitual |
| Ocupación de superficie | Ancho total de la zanja a lo largo del trazado | Solo boxes de entrada y salida |
| Problemas de tráfico | De forma continua durante toda la duración de la obra | Localizado en los hoyos, normalmente durante varios días |
| Rehabilitación del pavimento | Reconstrucción a todo ancho sobre la zanja | Reparación de un pequeño bache |
| Exposición a riesgos de interrupción del suministro de servicios públicos | High, along the whole trench | Moderate, concentrated at bore crossings |
| Primary risk | Strikes, trench collapse, restoration claims | Inadvertent returns, settlement, stuck pipe |
| Direct cost pattern | Low mobilisation, low cost per foot | High mobilisation, low restoration cost |
| Social cost | High: delay, access loss, noise, emissions | Low: surface stays in service |
| Best fit | Shallow gravity lines, large diameters, open ground, short runs | Paved roads, deep pressure mains, obstacle and waterway crossings |
Which Factors Actually Decide the Method?
Seven factors decide almost every HDD vs open cut question, and the comparison only becomes meaningful once they are answered. Work through them in order, because the first two can eliminate a method outright before cost is even discussed.
1. Service Type and Grade Requirement
The service type sets the geometry. Pressure pipe tolerates the curvature inherent in a directional bore; gravity pipe does not. If the line must flow by gravity — sanitary sewers, storm mains, some industrial drains — open cut gives exact fall along the entire run, and microtunneling is the trenchless alternative that holds grade. This is the single most common reason a project cannot simply choose HDD to avoid excavation.
2. Ground Conditions and Groundwater
Ground truth is the second gate. HDD design guidance such as ASTM F1962 assumes geotechnical data exists along the bore path, because cobbles, boulders, fractured rock and gravel govern reaming torque, fluid loss and the probability of an inadvertent return. Open cut has no soil preference — anything an excavator can move can be installed through — but it pays for groundwater with dewatering, for wet or unstable soil with shoring, and for contaminated ground with disposal under waste regulation.
3. Depth, Diameter and Run Length
Depth and length interact differently with each method. Open cut gets more expensive roughly in proportion to depth, because shoring, dewatering and spoil handling all scale with it; HDD gets relatively cheaper per metre as a run gets longer, because mobilisation is spread over more distance and the surface never has to be rebuilt. Diameter is the counterweight: open cut has no practical diameter ceiling, while HDD’s practical envelope tops out with rig capacity and the tension the pipe string can tolerate during installation.
4. Surface Value and Social Cost
The value of the surface is where open cut and HDD diverge most sharply, and it is the factor most often left out of a bid comparison. On an unpaved verge the surface is nearly worthless and open cut is the right answer. On a busy arterial with a recent asphalt overlay, a hospital frontage or a heritage streetscape, the surface is the most expensive asset in the project — restoration bonds, lane-closure windows, business-interruption claims and community complaints all attach to the trench rather than the pipe. Those costs are real even when they land on someone else’s budget line, and open cut construction is priced with restoration, traffic control and permits included from the start.
Environmental accounting now follows the same direction. A comparative study of trenchless and excavation technologies for restoring a sewage network reported roughly 59 percent lower CO2 emissions for the trenchless option, driven by avoided excavation, spoil haulage and material replacement — a factor that increasingly appears in municipal procurement scoring.
5. Schedule and Weather Exposure
Open cut trenching advances quickly through open ground but holds its schedule hostage to weather, lane-closure windows and unforeseen utilities from the first dig to the final paving. HDD front-loads rig mobilisation, pilot bore and reaming, then installs the pipe in a single continuous operation that is largely immune to surface conditions. On crossings where the pavement cannot be closed for months, that difference in elapsed calendar days usually outweighs the difference in unit rate.
6. Where the Risk Sits
Both methods carry risk; they place it in different places. Open cut concentrates exposure at the surface — utility strikes, trench collapse, traffic incidents, restoration claims — where consequences are frequent but usually bounded. HDD moves exposure underground: inadvertent returns, ground settlement or heave, bore collapse in loose or water-bearing soils, and in the worst case a stuck drill string or a pipe that cannot be pulled back. Those events are rarer but individually more expensive and harder to recover from.
7. Cost: Bid Price Versus Total Installed Cost
Only one of these numbers should decide the method. Bid price covers what the contractor is paid for the pipe work; total installed cost adds restoration, traffic control, permits, utility coordination, community cost, and a risk reserve for the failure mode each method actually carries. On urban work in particular, the two figures can rank the methods in opposite order, which is why the comparison must be built on one scope with identical line items.

When Should You Choose Open Cut?
Choose open cut construction when the surface is cheap, the alignment is short, and the pipe needs geometry that a bore cannot deliver. In those conditions open cut is not a compromise; it is the technically correct and lowest-cost answer, and boring the same line would add cost without removing risk.
- Gravity service with exact grade — sanitary and storm lines where fall must be continuous.
- Large diameters beyond practical HDD rig capacity or pipe-string limits.
- Shallow, short runs in open or unpaved ground, where HDD mobilisation cannot be amortised. Our own urban pricing usually finds open cut cheaper below roughly 100–150 feet of paved crossing when the road can tolerate a closure.
- Alignments already open for another scope — a road reconstruction, a water main renewal or a development servicing trench — where open cut construction shares excavation and traffic control already being paid for.
- Inspection-critical work where joints, bedding and welds must be verified in the open, or where future maintenance assumes direct surface access.
- Sites with no crossing obstacle — farmland, easements, industrial yards and new subdivisions, where the trench runs where no traffic or structure is inconvenienced.
When Should You Choose HDD?
Choose HDD when the obstacle or the surface is the dominant constraint, and the pipe can accept a curved alignment. The method pays for itself where excavation itself is the expensive part.
- Crossings beneath roads, highways, railways, runways and waterways, where closing the surface is impossible or prohibitively expensive.
- Deep pressure mains in congested corridors, where a trench deeper than 20 feet would need an engineered protective system and continuous dewatering.
- High-value or protected pavement — recently reconstructed roads, heritage streetscapes, hospital and airport frontages — where restoration cost and permit conditions dominate the budget.
- Dense utility corridors where excavating the full alignment would expose crews to strike risk on every metre.
- Environmentally sensitive ground where spoil disturbance, sediment control or tree protection makes open excavation unacceptable.
- Schedule-critical works that cannot survive months of lane closures or seasonal weather windows.

How Much Does the Method Change the Cost?
Cost comparison only means something against a defined scope, because both methods are dominated by site conditions and machine time rather than by the pipe itself. Published U.S. contractor estimates for HDD cluster around $10 to $50 per linear foot for small residential bores and roughly $40 to $80 per linear foot for larger commercial and municipal work, with mobilisation and setup as a fixed charge that short runs carry disproportionately.
Open cut is usually the lower bid in open ground, and it is worth saying plainly that boring is not automatically cheaper. A published cost comparison of open cut and HDD construction in Nairobi found HDD roughly 12.5 percent more expensive under those conditions — a useful reminder that method selection must follow site data, not a rule of thumb about trenchless technology.
| Componente de coste | A cielo abierto | HDD |
|---|---|---|
| Mobilisation and setup | Low: excavator, shoring, crew | High: rig, drilling fluid plant, reamer tooling |
| Main construction | Trench, dewatering, bedding, pipe lay, backfill | Pilot bore, reaming passes, pullback |
| Restauración de superficies | Full-width pavement rebuild over the trench | Pit reinstatement only |
| Traffic control | Continuous along the open trench | Localised at two pit locations |
| Utility coordination | Relocations and protection often required | Locates and potholing at bore crossings |
| Contingency driver | Strikes, collapse, restoration claims | Inadvertent returns, settlement, stuck pipe |
| Typical bid ranking in open ground | Baja | Más alto |
| Typical total installed cost ranking on a paved urban crossing | Higher once restoration, traffic and social cost are added | Lower once the trench is avoided |
The crossover sits in a different place on every site, and it moves with three local variables: the restoration rate the municipality charges, the lane-closure rules that apply, and the ground conditions that drive fluid handling. Our own urban pricing places the crossover between roughly 150 and 300 feet of paved crossing, with HDD usually winning beyond that range once community cost and repeat-repair risk are counted. Treat any published range as directional and price your own alignment.
Which Method Should You Choose? A Seven-Step Framework
We run the same seven steps on every method review, and the answer is sometimes the method we did not expect to recommend. Each step produces a written input, so the final decision can be defended to a client, a regulator or a ratepayer.
Step 1: Define the Service, Diameter and Grade
Record what the line carries, the pipe material and diameter, the required cover, and whether flow is pressure or gravity. Grade requirement is a binary gate: gravity service eliminates HDD as a primary method before any cost work begins.
Step 2: Characterise the Ground
Commission geotechnical investigation along the full alignment — not at the pits only — and flag cobbles, boulders, groundwater, fill and contamination. For HDD, confirm that the soil data supports the bore profile and fluid program the design assumes, consistent with the approach in ASTM F1962. For open cut, use the same data to price dewatering, shoring class and spoil disposal.
Step 3: Verify the Buried Utilities Physically
Collect records, then confirm critical conflicts by potholing or hydro-excavation to quality level A, the standard of care in ASCE 38 subsurface utility engineering practice. Records alone are the most common source of method mis-selection and of utility strikes: the alignment you can bore safely is only known once the conflicts are physically located.
Step 4: Test Each Method Against Its Envelope
Check diameter, length, depth and cover against the proven limits of the rig or equipment likely to be used. Some projects fail here rather than at cost: a diameter beyond the practical capacity of the pipe string, a bore length that exceeds the rig class available locally, or a cover requirement that makes the bore profile uneconomic all eliminate HDD regardless of how attractive the surface savings look.
Step 5: Price Both Methods on One Scope
Request line-item pricing for both routes on the same alignment, with the same pipe, the same depth, and the same restoration standard. Force the open cut side to carry pavement restoration, traffic control and permits, and the HDD side to carry fluid handling, contingency for inadvertent returns, and pit reinstatement. Quotes that omit their own method’s main risk are not comparable.
Step 6: Build a Risk Register and Price the Reserve
Score the likelihood and consequence of each method’s failure mode on your specific site — strikes and restoration claims for open cut, inadvertent returns and stuck pipe for HDD — and convert the result into a contingency figure rather than a qualitative comment. A method that looks cheaper on bid price frequently loses once its own failure mode is priced.
Step 7: Decide on Total Cost and Document It
Add direct cost, social cost and risk reserve, then compare. Document the inputs, the assumptions and the reason the losing method lost. That record is what makes the decision defensible at permitting, in audit, and when a later change order invites a challenge to the original choice.
Five Method-Selection Mistakes That Cost Owners Money
The same errors recur across projects, and each one is avoidable with data that is usually available before tender.
- Comparing bid price instead of total installed cost. Open cut trenching looks cheaper on a rate sheet because restoration, traffic control, permits and community cost sit outside the pipe contract, yet they belong in the comparison.
- Choosing before the ground is known. A soil model that does not match what the rig or the excavator finds is the leading cause of method change, rework and claims mid-project.
- Assuming boring is always cheaper — or always more expensive. Neither holds. The Nairobi cost study found HDD about 12.5 percent more expensive in its conditions; deep paved crossings in high-value streets regularly reverse that result.
- Ignoring social cost because someone else pays it. Traffic delay, access loss and business interruption are paid by road users and shopkeepers, but they return as complaints, claims and political risk for the owner.
- Skipping the capability check. A correct method choice fails if the contractor cannot provide the right rig class, guidance system, fluid plan or restoration crew — so verify capability before the recommendation is final.
When Neither Method Fits: Hybrid and Alternative Solutions
Some alignments reject both options, and the right answer is a third method or a combination rather than a compromise. Recognising those cases early avoids expensive re-planning at construction.
- Gravity crossings under obstacles: microtunneling holds continuous grade where HDD cannot, and it is the standard trenchless choice for gravity sewers in the range where open cut is unacceptable.
- Shallow cover or levee crossings: where fluid pressure management is the dominant hazard, alternative closed-loop systems remove the inadvertent-return mechanism at the source.
- Mixed alignments: many projects are best built both ways — open cut through the open majority of the route and HDD at the two or three crossings that justify a rig. The comparison is then per crossing rather than per project.
- Renewal rather than new installation: where an existing line can be rehabilitated, lining and pipe bursting may avoid a new alignment altogether and should be tested before either method is specified.
HDD vs Open Cut: Frequently Asked Questions
Is HDD cheaper than open cut?
Not automatically. In open ground, open cut almost always bids lower per linear foot because an excavator and shoring boxes mobilise faster than a drilling rig and fluid plant. HDD usually becomes the cheaper option on total cost once pavement restoration, traffic control, permits and utility-strike risk are counted. Run the HDD vs open cut cost comparison on one alignment with one scope before concluding either way.
When is open cut better than HDD?
Open cut is better when the line is shallow, short and in open or unpaved ground; when exact line and grade is required for gravity flow; when the pipe is large diameter; when the alignment is already being excavated for another scope; or when joints, bedding and welds must be inspected in the open.
Can HDD install gravity sewer lines?
HDD is a pressure-pipe method. A steerable bore follows a curve, and gravity service demands continuous fall along the whole run — a requirement open cut meets directly. Where a gravity line must pass beneath an obstacle without excavation, a method with continuous grade control such as microtunneling is the appropriate choice.
How deep can each method install pipe?
HDD depth is set by bore geometry rather than a fixed limit, and design guidance for maxi-HDD typically assumes substantial cover beneath the deepest obstacle. Open cut depth is limited by excavation safety and dewatering economics: a protective system is mandatory at five feet or deeper under OSHA 29 CFR 1926.652, and a registered professional engineer must design it beyond twenty feet.
Which method is faster?
Open cut advances quickly through open ground, but it stays exposed to weather, lane-closure windows and unforeseen utilities from first dig to final paving. On a paved or waterway crossing, HDD usually finishes sooner in elapsed calendar days: mobilisation, pilot bore and reaming are front-loaded, the pipe goes in during a single continuous operation, and the surface is never rebuilt.
What information do I need before choosing a method?
Five inputs are enough for a defensible comparison: service type and required grade; pipe diameter, material and depth; a geotechnical investigation along the alignment; verified utilities confirmed by potholing to ASCE 38 quality level A; and the surface context — pavement value, traffic sensitivity and closure restrictions.
How JSW Supports Pipeline Owners on Both Routes
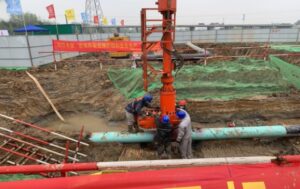
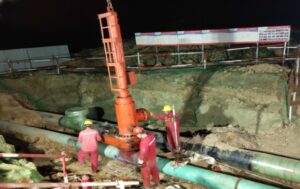
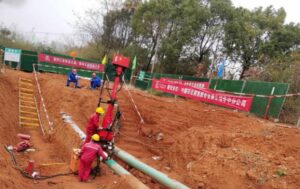
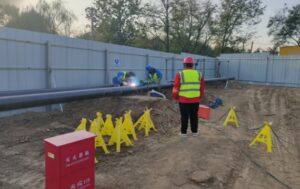
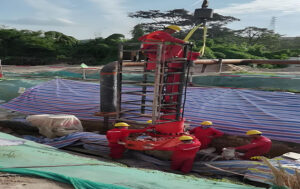
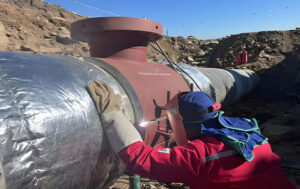
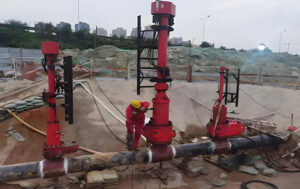
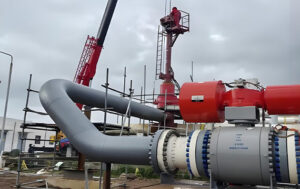
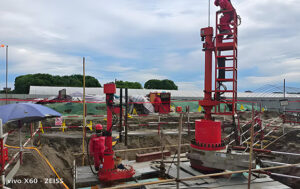
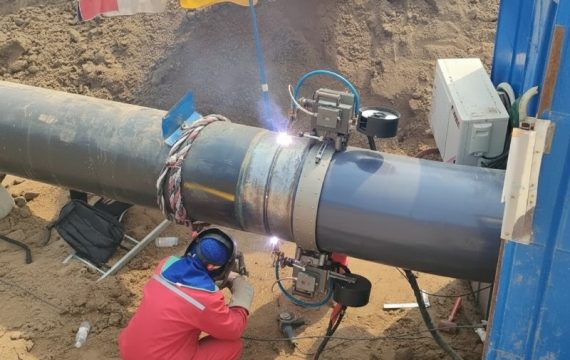
JSW is a pipeline engineering and construction partner that installs pipelines by both routes rather than selling a single method. Our servicios de perforación direccional horizontal cover bore design, pilot bore, reaming and pullback for road, rail, river and shoreline crossings, while our servicios de instalación de tuberías deliver conventional open cut construction with the same engineering team, the same restoration standard and the same documentation. Between the two sit the fabrication capabilities that decide whether an HDD bore succeeds: automatic pipeline welding to build the pipe string, cold bending and pipe preparation to match the bore profile, and pipeline repair and rehabilitation support for existing lines, alongside our trenchless technologies portfolio for crossings where neither HDD nor open cut alone is the answer.
Because one engineering team prices and plans both installation routes, our cost and risk comparisons reflect real site conditions instead of a preferred method:
- Both methods priced on one scope — open cut and HDD quoted with the same pipe, depth, restoration standard and contingency basis, so the comparison is like for like.
- Neutral method recommendation — we recommend the method that fits your alignment even when it is not the one we bid first, and we document why the alternative lost.
- Ground-first engineering — geotechnical review, utility potholing to ASCE 38 quality level A, and bore profiles designed around the soil data rather than around an available rig.
- Integrated fabrication — welding, bending, cutting and joint preparation in our own delivery chain, which removes interfaces that usually become schedule risk on a crossing.
- Transparent data — daily bore records, drilling fluid logs, restoration records and as-builts that stand up to audit and to ratepayer scrutiny.
If you are at the stage of comparing HDD vs open cut for a specific alignment, send your alignment length, pipe diameter and depth, any geotechnical report, and your utility records. Our engineers will return a side-by-side method review with the cost drivers, the risk register and a recommendation you can take to tender.
Not sure which method wins the HDD vs open cut comparison on your alignment?
Our engineers will run the seven-step method review on your project and return a side-by-side HDD vs open cut comparison — cost drivers, risk register and a documented recommendation. Reach us through our contact form, and we will tell you exactly which data to prepare.










 English
  Arabic
  Russian
  Spanish
  French
  Vietnamese
  Polish
  Thai
Thai  Indonesian
  Turkish
  Portuguese